
There’s something special about recreating a beloved dish in your own kitchen. The aroma, the flavors, and the memories it brings—it’s like taking a bite of nostalgia. If you’ve ever enjoyed a classic Maryland-style crab cake, you know how irresistible it can be. But what if you could enjoy that same deliciousness with a modern twist?
This gluten-free crab cake recipe is here to prove that you don’t need traditional ingredients to achieve restaurant-quality results. By using fresh seafood and the right seasonings, you can savor every bite without compromise. The secret lies in smart ingredient swaps that keep the flavor intact while catering to dietary needs.
Whether you’re hosting a dinner party or simply treating yourself, this dish is a testament to how small changes can make a big difference. Let’s dive into how you can bring this innovative yet classic dish to your table.
Key Takeaways
- Discover a modern take on a traditional favorite with this gluten-free adaptation.
- Fresh seafood and proper seasoning are key to achieving authentic flavor.
- Smart ingredient swaps ensure the dish remains delicious and accessible.
- Perfect for gatherings or a special treat at home.
- Restaurant-quality results are achievable with the right techniques.
Introduction to a Tasty Twist on Crab Cakes
Culinary traditions often evolve to meet modern tastes and dietary preferences. This is especially true for classic dishes like crab cakes, which have been reimagined to suit today’s kitchens. By combining fresh seafood with thoughtful ingredient swaps, you can enjoy a dish that’s both familiar and innovative.
The inspiration behind this twist comes from a desire to balance flavor and dietary needs. Fresh crab, zesty lemon, and the right seasonings ensure the dish remains authentic while being accessible to more people. This approach mirrors the Maryland style, known for its rich seafood heritage, but with a modern update.
Quality ingredients are key to achieving the perfect texture and taste. Fresh crab provides a sweet, delicate flavor, while lemon adds a bright, tangy note. These elements work together to create a dish that’s both satisfying and versatile.
Below is a quick comparison of traditional and modern crab cake ingredients:
| Ingredient | Traditional Version | Modern Twist |
|---|---|---|
| Binding Agent | Breadcrumbs | Alternative Binders |
| Seasoning | Old Bay | Custom Blend |
| Flavor Enhancer | Mayonnaise | Lemon Zest |
This recipe proves that innovation doesn’t mean sacrificing authenticity. By staying true to the essence of the dish while making thoughtful adjustments, you can create a meal that’s both classic and contemporary.
Essential Ingredients and Tools for Your Crab Cakes
Crafting a memorable dish starts with the right ingredients and tools. For a dish like crab cakes, the quality of your components and the equipment you use can make all the difference. Let’s explore what you’ll need to create a flavorful and well-textured result.
Key Ingredients Overview
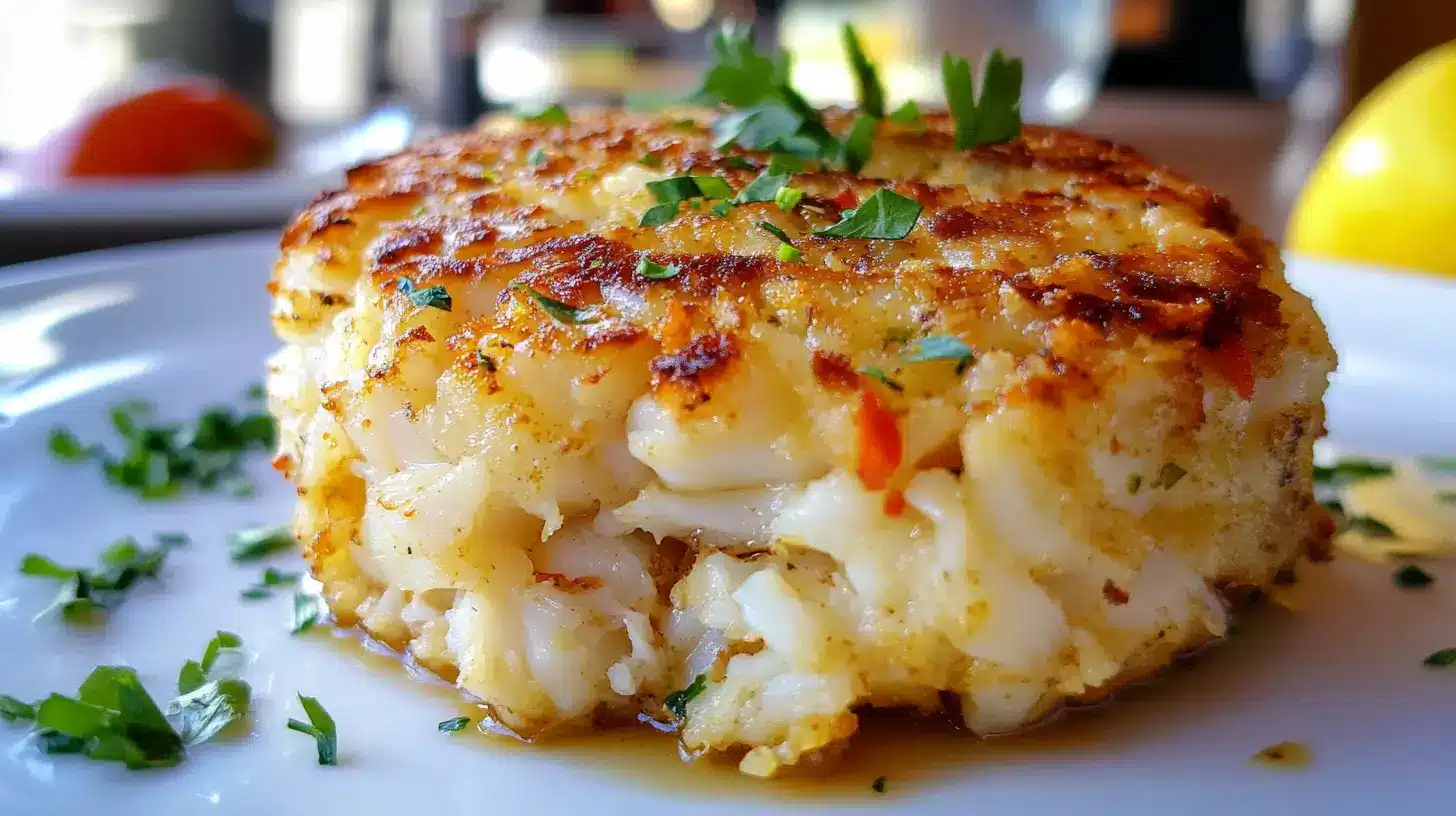
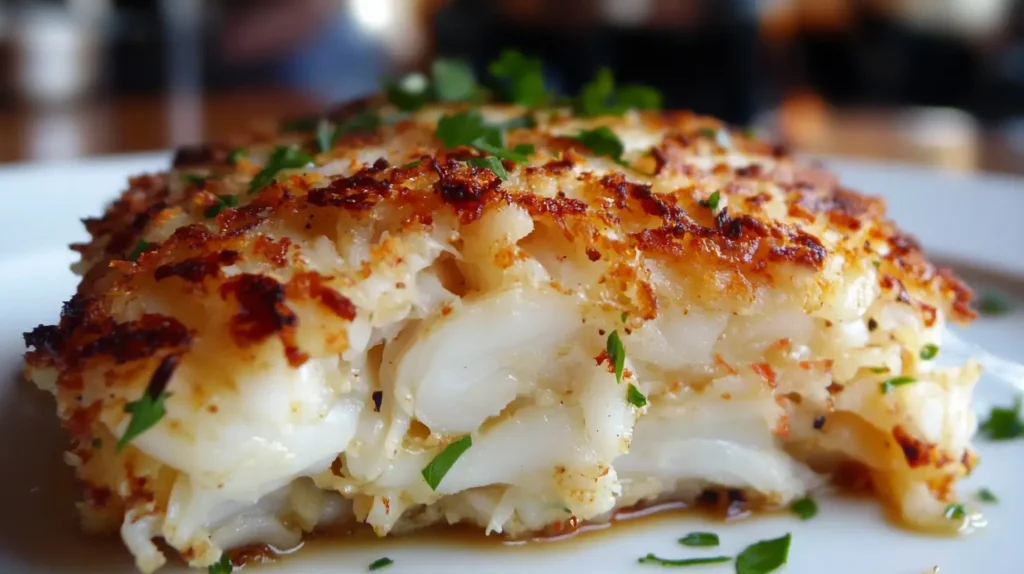
The star of the show is, of course, the crab meat. Opt for jumbo lump or lump varieties for their sweet flavor and firm texture. These types ensure your dish stays authentic and satisfying.
To bind the mixture, you’ll need a reliable alternative to traditional breadcrumbs. Ingredients like almond flour or crushed crackers work well to hold everything together without overpowering the delicate flavor of the crab.
Seasonings are equally important. A blend of Old Bay, mustard, and lemon zest adds depth and brightness to the dish. These elements work together to create a balanced and flavorful experience.
Must-Have Kitchen Tools
Having the right tools on hand simplifies the process and ensures success. Start with a large mixing bowl to gently combine your ingredients without breaking up the crab meat. A rubber spatula is perfect for folding the mixture evenly.
Measuring cups and spoons are essential for precision, especially when working with seasonings. Finally, a non-stick skillet or baking sheet will help you achieve a golden, crispy finish.
| Ingredient | Traditional Version | Modern Twist |
|---|---|---|
| Crab Meat | Backfin | Jumbo Lump |
| Binding Agent | Breadcrumbs | Almond Flour |
| Seasoning | Old Bay | Custom Blend |
With these ingredients and tools, you’re well-equipped to create a dish that’s both classic and contemporary. The right choices ensure a restaurant-quality finish every time.
Selecting the Perfect Crab Meat
Choosing the right crab meat is the foundation of a delicious dish. The type you select directly impacts the texture, flavor, and overall quality of your meal. Understanding the differences between jumbo lump, lump, and backfin crab meat ensures you make the best choice for your recipe.
Jumbo Lump, Lump, and Backfin Explained
Jumbo lump crab meat comes from the two large muscles connected to the swimming fins. It’s prized for its large, firm chunks and sweet flavor. This type is ideal for dishes where presentation matters, as the pieces remain intact during cooking.
Lump crab meat is a mix of smaller pieces from the body and swimming fins. It’s slightly less expensive than jumbo lump but still offers a sweet, delicate flavor. This type works well in recipes where texture is important but large chunks aren’t necessary.
Backfin crab meat includes smaller, broken pieces and shreds. It’s more affordable and perfect for dishes where the crab is mixed with other ingredients. While it’s less visually striking, it still delivers a rich, authentic flavor.
Fresh, refrigerated crab meat is always the best choice for superior texture and taste. Canned options can be convenient but often lack the same quality. When shopping, look for crab meat that’s bright, moist, and free of any off odors.
| Type | Texture | Best Use |
|---|---|---|
| Jumbo Lump | Large, firm chunks | Presentation-focused dishes |
| Lump | Smaller, delicate pieces | Balanced texture dishes |
| Backfin | Shredded, broken pieces | Mixed ingredient recipes |
When preparing your dish, take a minute to inspect the crab meat for freshness. Pair it with ingredients like egg and seasonings to enhance its natural flavor. By selecting high-quality lump crab meat, you’ll ensure every bite is chunky, flavorful, and satisfying.
Step-by-Step Instructions for the gluten free crab cake recipe
Creating a dish from scratch allows you to control every detail, ensuring perfection. This section walks you through the process of preparing and shaping your patties for a flawless result.
Preparing and Mixing the Ingredients
Start by whisking together the egg, mayonnaise, and Dijon mustard in a large bowl. Add your seasonings, such as Old Bay and lemon zest, to enhance the flavor. Gently fold in the jumbo lump crab meat to keep the large chunks intact.
Next, incorporate the bread crumbs or alternative binders like almond flour. Mix everything carefully to avoid overworking the mixture. This ensures the patties hold their shape while maintaining a tender texture.
Forming Your Crab Cake Patties
Use a measuring cup to portion the mixture evenly onto a baking sheet. This guarantees uniform patties that cook at the same rate. Shape each portion into a round patty, pressing gently to firm it up without compacting it too much.
Once formed, place the patties in the refrigerator to chill for at least 30 minutes. This step is crucial for optimal binding and flavor development. Chilling also helps the patties hold their shape during cooking.
| Step | Key Action | Tip |
|---|---|---|
| 1 | Whisk wet ingredients | Use a large bowl for easy mixing |
| 2 | Fold in crab meat | Be gentle to preserve chunks |
| 3 | Add bread crumbs | Mix until just combined |
| 4 | Shape and chill | Chill for 30 minutes |
“The key to perfect patties lies in gentle handling and proper chilling. Take your time to ensure every step is done right.”
Baked, Fried, and Air Fryer Cooking Options
Exploring different cooking methods can elevate your dish to new heights. Whether you prefer baking, pan-frying, or using an air fryer, each technique offers unique benefits. Let’s dive into the details to help you choose the best method for your kitchen and dietary preferences.
How to Bake Your Crab Cakes
Baking is a great option for a lighter dish without sacrificing flavor. Preheat your oven to 375°F and line a baking sheet with parchment paper. Place your patties on the sheet and brush them with melted butter for a golden, crispy crust.
Bake for 15-20 minutes, flipping halfway through. This method ensures even cooking and a tender interior. Use a meat thermometer to check that the internal temperature reaches 145°F for perfectly cooked patties.
Pan-Frying Tips and Air Fryer Alternatives
Pan-frying creates a rich, crispy exterior that’s hard to resist. Heat a skillet over medium heat and add a tablespoon of oil. Use neutral oils like canola or avocado for a clean flavor. Cook each patty for 3-4 minutes per side until golden brown.
For a modern twist, try using an air fryer. Preheat it to 375°F and lightly spray the basket with oil. Cook the patties for 10-12 minutes, flipping halfway through. This method reduces oil use while maintaining a satisfying crunch.
“Monitoring the internal temperature ensures your patties are cooked through without drying out. Aim for 145°F for the best results.”
Each cooking method has its advantages. Baking is ideal for a lighter dish, pan-frying delivers a classic crispy crust, and air frying offers a healthier alternative. Choose the method that suits your taste and kitchen tools.
Enhancing Flavor with Sauces and Seasonings
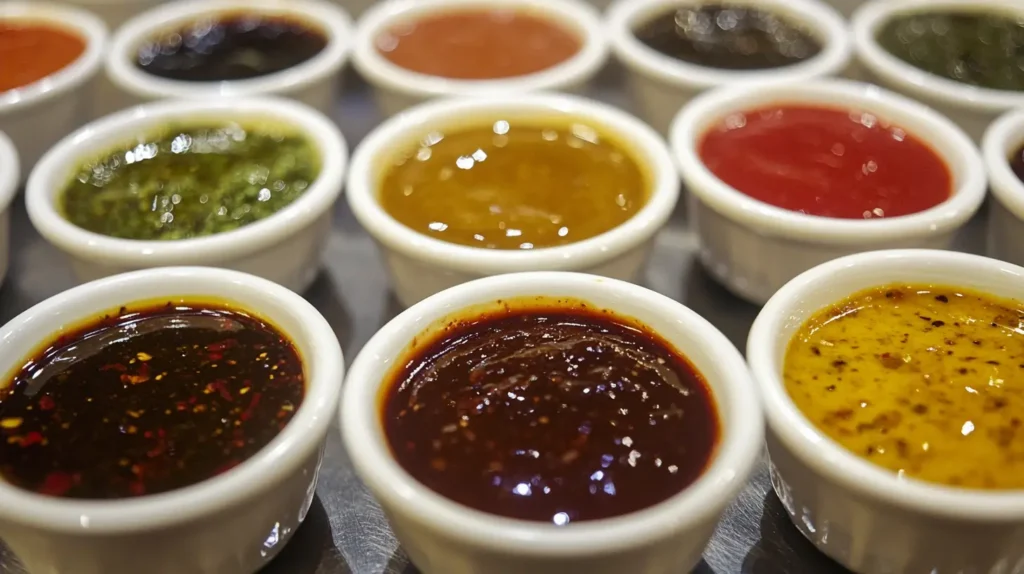
The right sauce can transform a good dish into an unforgettable one. Whether you’re preparing a Maryland-style classic or experimenting with fresh lump crab, sauces add depth and character. From tangy tartar to creamy aioli, these accompaniments elevate the natural flavors of your meal.
Creating a Homemade Tartar Sauce
Homemade tartar sauce is a simple yet impactful addition to your dish. Start with mayonnaise as the base, then mix in finely chopped pickles, capers, and a squeeze of lemon juice. Add a pinch of Old Bay seasoning for a Maryland-inspired twist.
This sauce pairs perfectly with jumbo lump crab, enhancing its sweetness without overpowering it. For a smoother texture, blend the ingredients briefly. Chill the sauce for at least 30 minutes before serving to let the flavors meld.
Whipping Up Lemon Garlic Aioli
Lemon garlic aioli brings a bright, creamy contrast to your dish. Combine mayonnaise with minced garlic, lemon zest, and a touch of Dijon mustard. Whisk until smooth, then adjust the seasoning to taste.
This aioli complements the delicate flavor of fresh lump crab beautifully. For a lighter version, substitute Greek yogurt for half the mayonnaise. Serve it alongside your patties for a burst of flavor in every bite.
“The secret to a great sauce lies in balancing acidity, creaminess, and seasoning. Take your time to perfect the blend.”
Using fresh lump crab and thoughtful seasoning ensures your dish stays true to its Maryland roots. Experiment with these sauces to find your favorite combination and make every meal memorable.
Tips and Tricks for Perfect Texture and Binding
Achieving the perfect texture in your dish requires attention to detail and the right techniques. Whether you’re using gluten-free bread or alternative binders, the way you handle the mixture makes all the difference. Let’s explore how to ensure your patties stay intact and flavorful.
Chilling and Binding Techniques
Chilling the mixture before forming patties is a game-changer. It helps the ingredients bind together, preventing them from falling apart during cooking. After mixing, place the mixture in the refrigerator for at least 30 minutes. This step ensures the patties hold their shape and develop a rich flavor.
Using the right binder is equally important. Ingredients like gluten-free bread crumbs or almond flour work well to keep the mixture cohesive. Avoid overworking the mixture, as this can lead to a dense texture. A gentle touch is key to maintaining the integrity of the crab meat.
Preventing Over-Mixing for Chunky Crab
Over-mixing can break down the delicate chunks of crab, resulting in a less satisfying texture. Use a rubber spatula to fold the ingredients together gently. This method ensures the mixture stays chunky and tender.
Here’s a quick guide to help you achieve the perfect texture:
| Step | Tip |
|---|---|
| Chilling | Refrigerate for 30 minutes |
| Binding | Use gluten-free bread crumbs |
| Mixing | Fold gently with a spatula |
“Small details, like chilling and gentle mixing, can elevate your dish from good to great. Take your time to get it right.”
By following these tips, you’ll create a dish that’s both visually appealing and delicious. Remember, the key lies in careful preparation and attention to detail.
Serving Accompaniments and Presentation Ideas
Presentation is the final touch that turns a meal into an experience. The way you serve your dish can make it unforgettable, whether it’s for a dinner party or a casual family meal. Simple garnishes, thoughtful plating, and the right side dishes can elevate your creation to restaurant-quality status.
Garnish and Side Dish Pairings
Start with garnishes that add both flavor and visual appeal. Lemon wedges are a classic option that brightens the dish. Fresh herbs like parsley or dill add a pop of color and a refreshing aroma. For a tangy touch, serve with cocktail sauce or a homemade tartar sauce.
Pair your dish with sides that complement its flavors. A crisp salad or coleslaw adds a refreshing contrast. Roasted vegetables or a light quinoa salad are excellent options for a healthier twist. These pairings balance the richness of the main dish and create a well-rounded meal.
Here are some quick ideas for side dishes:
- Crisp green salad with a lemon vinaigrette
- Classic coleslaw with a creamy dressing
- Roasted asparagus or zucchini
- Quinoa salad with fresh herbs and cherry tomatoes
Plating Tips for a Stunning Presentation
Plating is an art that enhances the dining experience. Use a baking sheet to cool your patties before arranging them on the plate. This ensures they stay intact and look their best. Place the patties in the center of the plate and arrange the sides around them for a balanced look.
Add a drizzle of sauce for a professional touch. A squeeze of lemon juice or a dollop of aioli can make the dish pop. Use a cup to measure portions for even plating. This creates a cohesive and appealing presentation.
“The way you present your dish speaks volumes. Take the time to arrange it thoughtfully, and your guests will notice the effort.”
For a special touch, garnish with edible flowers or microgreens. These small details can transform a simple meal into a feast for the eyes. Whether it’s a casual day or a formal gathering, these tips ensure your dish looks as good as it tastes.
Nutritional Insights and Dietary Variations
Understanding the nutritional value of your meal helps you make informed choices. Whether you’re following a specific diet or simply aiming for healthier options, this section provides insights into calories, macronutrients, and ingredient swaps. By making thoughtful adjustments, you can enjoy a flavorful dish that fits your lifestyle.
Healthy Ingredient Substitutions
Small changes can have a big impact on the nutritional profile of your dish. For example, swapping regular mayonnaise for avocado oil mayo improves the fat profile while maintaining creaminess. Using almond flour instead of traditional binders keeps the dish light and aligns with dietary needs.
Fresh, high-quality ingredients not only enhance flavor but also provide essential nutrients. Opt for fresh herbs and citrus zest to add brightness without extra calories. These choices ensure your meal is both delicious and nutritious.
| Ingredient | Traditional | Healthier Alternative |
|---|---|---|
| Mayonnaise | Regular | Avocado Oil Mayo |
| Binder | Breadcrumbs | Almond Flour |
| Cooking Oil | Vegetable Oil | Olive or Avocado Oil |
Portion control is another key factor. Each serving contains approximately 200 calories, making it a balanced choice for any meal. Pair it with a fresh salad or roasted vegetables for a complete, nutritious plate.
“Healthy eating doesn’t mean sacrificing flavor. With the right substitutions, you can enjoy your favorite dishes guilt-free.”
This dish works well as an appetizer or main course. You can fry or bake the patties, depending on your preference. For a lighter option, place the mixture on a baking sheet and bake until golden. These variations ensure flexibility while keeping the dish aligned with your dietary goals.
Storage, Reheating, and Leftover Tips
Leftovers don’t have to lose their charm with the right techniques. Proper storage and reheating can make your dish just as enjoyable the next day. Whether you’re saving it for lunch or planning ahead for a busy week, these tips will help you maintain flavor and texture.
Best Practices for Refrigeration and Freezing
To keep your dish fresh, store it in an airtight container in the refrigerator. It will stay good for up to three days. For longer storage, freezing is a great option. Wrap each portion individually in plastic wrap or foil, then place them in a freezer-safe bag. This prevents freezer burn and keeps the flavors intact.
When freezing, label the bag with the date to track freshness. Properly stored, your dish can last up to two months in the freezer. Thaw it in the refrigerator overnight before reheating for the best results.
Reheating Without Sacrificing Texture
Reheating can be tricky, but the right method ensures your dish stays delicious. For baked or fried portions, the oven is your best friend. Preheat it to 350°F and place the dish on a baking sheet. Lightly brush with melted butter to restore moisture and crispness. Heat for 10-15 minutes, flipping halfway through.
If you’re short on time, the microwave works too. Cover the dish with a damp paper towel to retain moisture. Heat in 30-second intervals, checking to avoid overcooking. For a quick fix, a skillet on medium heat with a touch of butter can revive the crispy exterior.
“Proper storage and reheating techniques ensure your meal stays as flavorful as the day it was made.”
With these tips, you can enjoy your dish days later without compromising on quality. A pinch of salt before serving can enhance the flavors, making it taste freshly prepared. Whether you’re using the oven, microwave, or skillet, these methods guarantee a satisfying meal every time.
Conclusion
Transforming a classic dish into a modern favorite is easier than you think. This recipe highlights the perfect balance of flavor, texture, and nutrition, making it a versatile choice for any occasion. With simple steps and adaptable ingredients, you can create a dish that suits your dietary needs without compromising on taste.
Experiment with different sauces like tartar sauce or a zesty cocktail sauce to enhance the flavors. Garnish with fresh parsley for a vibrant finish. Whether you bake, fry, or use an air fryer, the results are consistently delicious.
Store leftovers properly to maintain their quality. Reheat in the oven or skillet to restore their crispy texture. This dish is perfect for sharing with friends and family, offering a flavorful experience everyone will enjoy.