
Imagine biting into a dessert that perfectly balances tangy and sweet flavors. These lemon bars do just that, offering a refreshing burst of citrus in every bite. Whether you’re hosting a spring gathering or simply craving a homemade treat, this recipe is a must-try.
The base is a buttery shortbread crust that crumbles delicately with each forkful. On top, a smooth, curd-like filling made with fresh lemon juice adds a zesty kick. It’s a dessert that feels both indulgent and light, making it ideal for any occasion.
What makes this recipe stand out is its simplicity. With just a handful of ingredients, including powdered sugar for the perfect finish, you can whip up these bars in no time. Plus, it’s easy to adapt for dairy-free preferences, ensuring everyone can enjoy it.
Featured in popular video tutorials, this treat has become a favorite for its ease of preparation and crowd-pleasing flavor. Whether you’re a seasoned baker or a beginner, this recipe promises to impress.
Key Takeaways
- Combines a buttery shortbread crust with a tangy lemon filling.
- Uses simple ingredients, including fresh lemon juice and powdered sugar.
- Easy to adapt for dairy-free diets.
- Perfect for spring gatherings or everyday indulgence.
- Featured in video tutorials for step-by-step guidance.
Introduction to These Tangy, Gluten-Free Lemon Bars
Few desserts capture the essence of citrus quite like this classic treat. With roots in traditional lemon desserts, this modern adaptation offers a delightful balance of tart and sweet. The buttery crust pairs perfectly with the zesty filling, creating a harmony of flavor that’s hard to resist.
Growing up, many of us have fond memories of enjoying citrus-based desserts during springtime. This recipe brings those nostalgic moments to life while catering to today’s dietary needs. By using proper ingredients and equipment, you can recreate this beloved treat with ease.
“The secret to a great citrus dessert lies in the balance of acidity and sweetness.”
To achieve the authentic flavor, it’s essential to use fresh ingredients. A simple bowl, a pinch of salt, and quality eggs are all you need to get started. Let the mixture come to room temperature for the best results. This ensures a smooth, custard-like texture that’s simply irresistible.
Here’s a quick overview of what makes this dessert stand out:
- Combines a buttery crust with a tangy filling.
- Uses fresh, high-quality ingredients for authentic taste.
- Easy to prepare, even for beginners.
Whether you’re baking for a special occasion or simply indulging at home, this dessert is sure to impress. Keep these tips in mind, and you’ll create a treat that’s as delightful as it is memorable.
Essential Ingredients and Flour Blend Selection
Creating a perfect dessert starts with selecting the right ingredients. For this treat, the choice of components plays a crucial role in achieving the desired texture and flavor. Let’s break down what you’ll need for both the crust and the filling.
Shortbread Crust Ingredients
The base of this dessert is a buttery, crumbly crust. To make it, you’ll need melted butter, granulated sugar, a pinch of salt, and a high-quality flour blend. Brands like Pillsbury offer excellent options for achieving the perfect consistency. Adding a touch of vanilla enhances the flavor, making the crust irresistible.
Lemon Filling Components
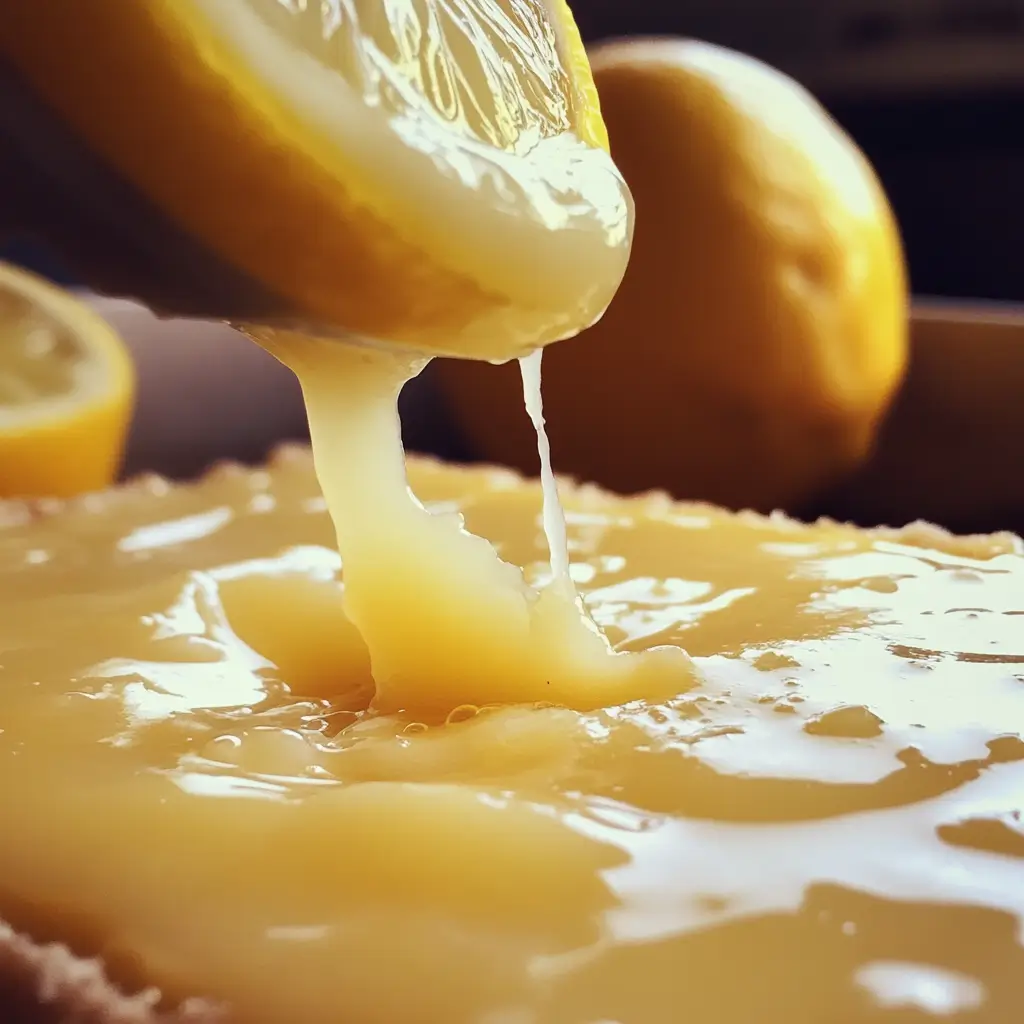
The filling is where the magic happens. Fresh lemon juice provides the tangy kick, while eggs create a smooth, custard-like texture. A small amount of flour helps thicken the mixture, ensuring it sets perfectly. Granulated sugar balances the acidity, creating a harmonious blend of flavors.
Choosing the right ingredients is essential. Opt for fresh, high-quality items to ensure the best results. With these components, you’re well on your way to crafting a dessert that’s both delicious and memorable.
Mastering the Gluten Free Lemon Bars Recipe
Crafting a dessert that’s both tangy and sweet requires precision and care. Start by blending the ingredients for the crust. Combine melted butter, sugar, and a pinch of salt in a bowl. Mix until the texture resembles coarse crumbs. Press this mixture into a square baking pan, ensuring an even layer.
Next, focus on the filling. Whisk together fresh juice, eggs, and sugar until smooth. Add a small amount of flour to thicken the mixture. Pour this over the baked crust, spreading it evenly. Bake until the filling sets, creating a custard-like consistency.
Timing is crucial. Bake the crust for about 15 minutes before adding the filling. Once assembled, bake for another 20-25 minutes. Let the dessert cool completely before chilling it in the fridge for at least an hour. This ensures the bars are firm yet tender.
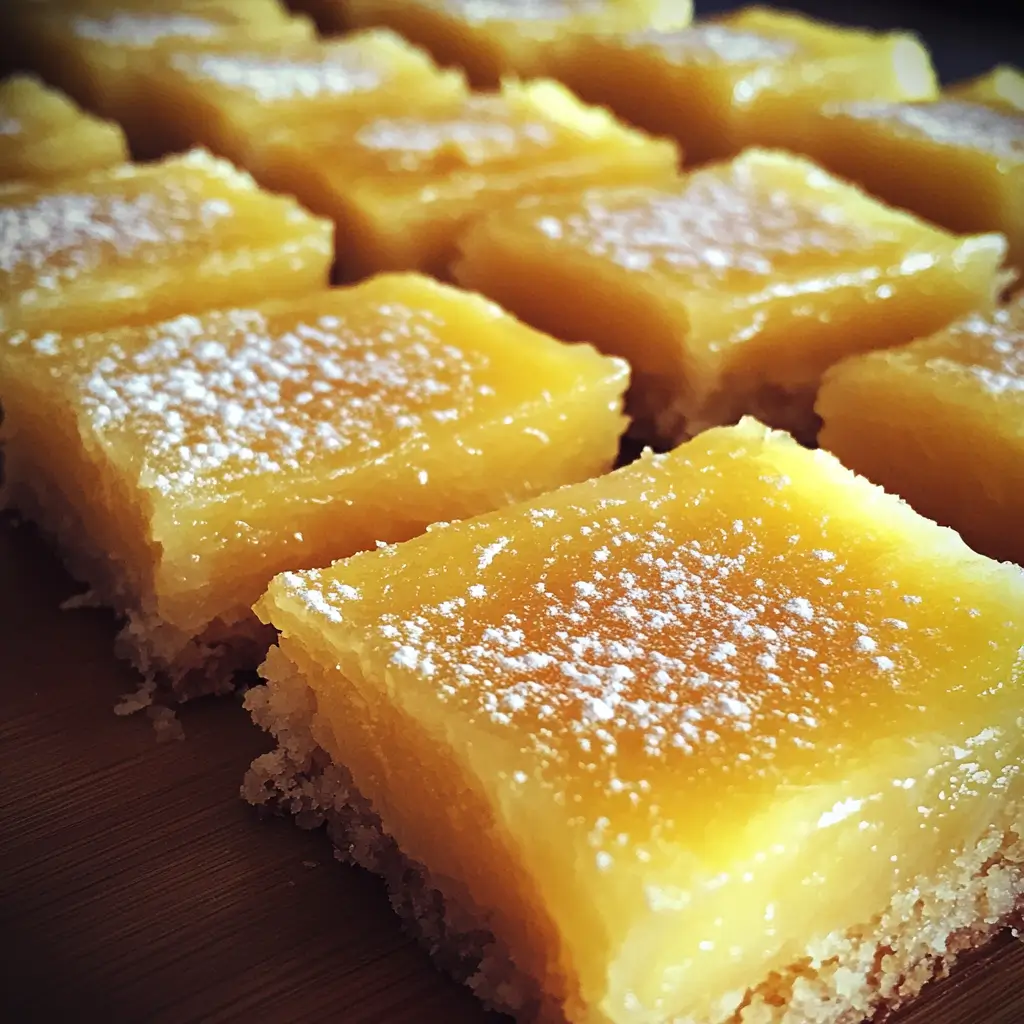
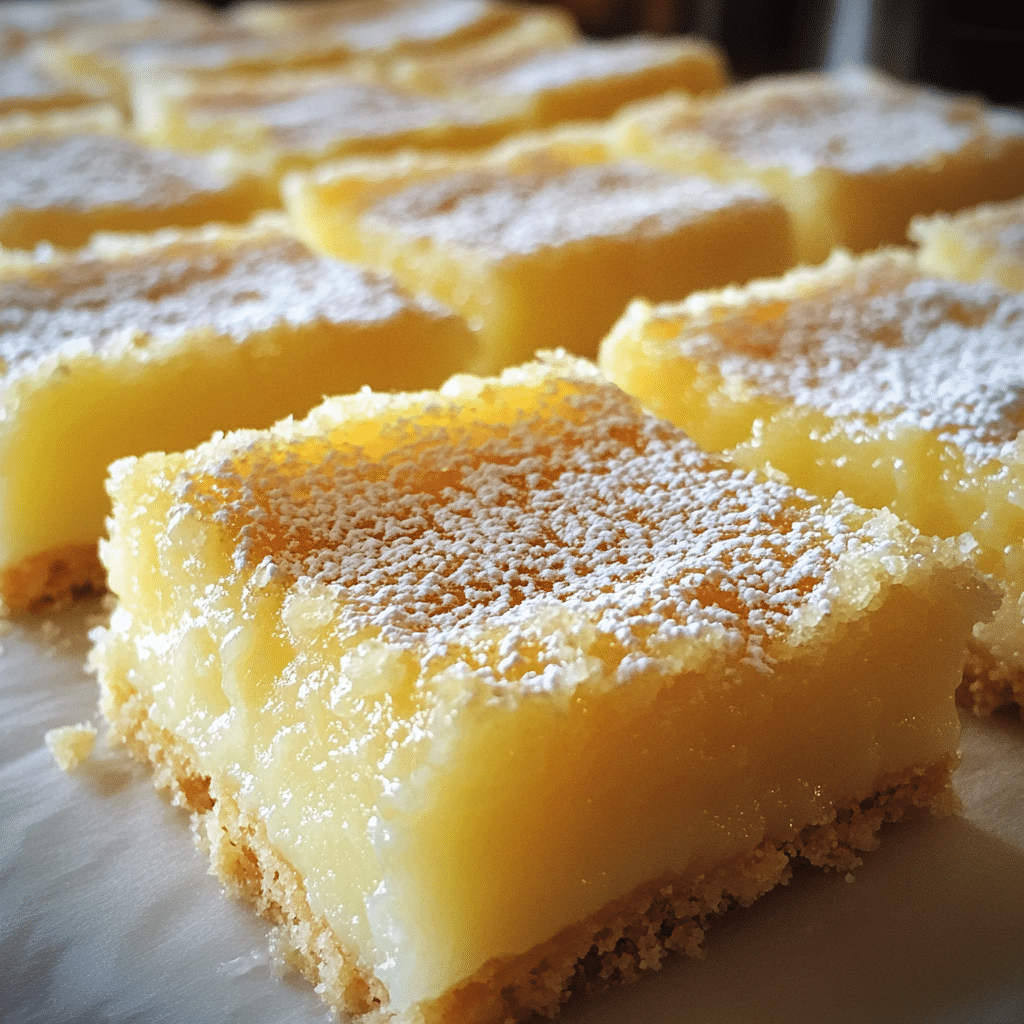
For the perfect curd-like texture, avoid overbaking. The filling should jiggle slightly when removed from the oven. It will set further as it cools. Use a sharp knife to cut into neat squares, and dust with powdered sugar for a finishing touch.
Follow these steps, and you’ll create a dessert that’s both visually appealing and delicious. With attention to detail, your bars will have the ideal balance of flavors and textures.
Baking the Buttery Shortbread Crust
The foundation of any great dessert lies in its crust, and this one is no exception. A well-made shortbread crust provides the perfect base for the tangy filling. It’s buttery, crumbly, and just the right amount of sweet.
Mixing and Forming the Dough
Start by combining melted butter, granulated sugar, and a pinch of salt in a bowl. Add your preferred flour blend and mix until the texture resembles coarse crumbs. Avoid overworking the dough to keep it tender.
Once mixed, press the dough evenly into a square baking pan. Use your fingertips or an offset spatula to ensure it’s compact and level. This step is crucial for a consistent bake.
Baking Time and Temperature Guidelines
Preheat your oven to 350°F (175°C). Bake the crust for about 15 minutes, or until the edges turn a light golden color. Keep an eye on it to prevent overbaking, which can make the crust too hard.
For added flavor, consider incorporating a teaspoon of lemon zest into the dough. It enhances the citrus notes without overpowering the buttery richness.
| Step | Details |
|---|---|
| Mixing | Combine butter, sugar, salt, and flour blend until crumbly. |
| Pressing | Use fingertips or spatula to press dough evenly into the pan. |
| Baking | Bake at 350°F for 15 minutes until edges are golden. |
Following these steps ensures your shortbread crust is perfectly baked and ready to complement the tangy filling. Take your time, and you’ll be rewarded with a dessert that’s both visually appealing and delicious.
Preparing the Tangy Lemon Filling
The secret to a vibrant citrus dessert lies in its filling. A smooth, custard-like texture with the right balance of tartness and sweetness is what makes this treat unforgettable. Let’s dive into the steps to create the perfect lemon filling.
Whisking and Combining Ingredients
Start by whisking fresh lemon juice, eggs, and sugar in a bowl. This step is crucial to avoid lumps and ensure a silky texture. Use a gentle, circular motion to incorporate air, which helps create a light and fluffy consistency.
Add a pinch of zest for an extra burst of citrus flavor. The zest enhances the tanginess without overpowering the sweetness. Combine the ingredients slowly to maintain the mixture’s smoothness.
Achieving the Perfect Custard Consistency
To achieve a creamy, custard-like texture, cook the filling over low heat. Stir continuously to prevent curdling. The mixture should thicken slightly but remain pourable. Overcooking can lead to a rubbery texture, so keep a close eye on it.
Once the filling reaches the desired consistency, remove it from the heat. Let it cool slightly before pouring it over the baked crust. This ensures the layers blend seamlessly without compromising the texture.
- Whisk ingredients thoroughly to avoid lumps.
- Incorporate zest for a balanced flavor profile.
- Cook gently to achieve a smooth, custard-like texture.
- Allow the filling to cool slightly before assembling.
By following these steps, you’ll create a lemon filling that’s both tangy and smooth, perfectly complementing the buttery crust. Take your time, and you’ll be rewarded with a dessert that’s as delightful to eat as it is to prepare.
Assembling and Baking Your Dessert to Perfection
Bringing together the buttery crust and zesty filling is the final step to creating a dessert masterpiece. Carefully pour the smooth, citrus-infused filling over the warm crust. Ensure the layer is even to promote uniform baking and a consistent texture.
Timing is crucial during the second bake. Overbaking can lead to a rubbery texture, so keep a close eye on the oven. The filling should jiggle slightly when removed, as it will continue to set as it cools. This ensures a custard-like consistency that’s both smooth and firm.
“The key to a perfect dessert lies in patience—letting it cool completely before cutting ensures clean, neat slices.”
After baking, allow the dessert to cool in the pan for at least an hour. This step is essential for the layers to set properly. Once cooled, transfer it to the fridge for an additional hour to enhance the texture and make cutting easier.
Here are some additional tips for a flawless finish:
- Use a sharp knife to cut into squares, wiping it clean between slices for neat edges.
- Dust with powdered sugar just before serving for a polished presentation.
- Store leftovers in an airtight container to maintain freshness.
| Step | Details |
|---|---|
| Pouring Filling | Ensure an even layer over the warm crust for uniform baking. |
| Second Bake | Bake until the filling jiggles slightly; avoid overbaking. |
| Cooling | Let cool in the pan for 1 hour, then chill in the fridge. |
| Cutting | Use a sharp knife for clean, neat slices. |
By following these steps, you’ll create a dessert that’s as visually appealing as it is delicious. Attention to detail during assembly and baking ensures a treat that’s both satisfying and memorable.
Ingredient Substitutions and Flavor Variations
Adapting this dessert to fit dietary preferences is easier than you might think. Whether you’re avoiding dairy or following a vegan lifestyle, simple swaps can help you enjoy this treat without compromising on taste or texture.
Dairy-Free and Vegan Alternatives
For a dairy-free version, replace traditional butter with non-dairy options like coconut oil or vegan margarine. These alternatives maintain the crust’s richness but may slightly alter its texture. Let the mixture come to room temperature before baking for the best results.
Eggs can be substituted with flaxseed meal or applesauce for a vegan-friendly filling. These options provide binding properties but may require a longer baking time to set properly. Adjust the oven temperature slightly to avoid overcooking.
Sweeteners like maple syrup or agave nectar can replace granulated sugar. These alternatives add a unique flavor profile while keeping the dessert sweet. Be mindful of the liquid content, as it may affect the filling’s consistency.
Flavor Tweaks and Adjustments
For a bolder citrus flavor, add extra zest or use lime or orange juice instead of lemon. These variations introduce new dimensions while keeping the dessert refreshing. Experiment with different combinations to find your favorite.
Here’s a quick guide to substitutions and their effects:
| Ingredient | Substitute | Effect |
|---|---|---|
| Butter | Coconut oil, vegan margarine | Richness with slight texture change |
| Eggs | Flaxseed meal, applesauce | Binding, may require longer bake time |
| Sugar | Maple syrup, agave nectar | Unique flavor, adjust liquid content |
By making these adjustments, you can tailor the dessert to your dietary needs or flavor preferences. Keep an eye on baking times and textures to ensure the final result is just as delightful as the original.
Storage, Freezing, and Serving Suggestions
Proper storage and presentation can elevate your dessert from good to unforgettable. To maintain its texture and flavor, store the finished product in an airtight container. Refrigerate for up to five days, ensuring it’s covered to prevent drying out.
For longer storage, freezing is an excellent option. Wrap individual pieces in plastic wrap and place them in a freezer-safe bag. They can be stored for up to three months without compromising the custard-like consistency. Thaw in the refrigerator overnight before serving.
When it’s time to serve, let the dessert come to room temperature for about 15 minutes. This ensures the filling remains smooth and the crust stays tender. Dust with powdered sugar just before serving for a polished, professional look.
Here are some additional tips to make your dessert even more appealing:
- Use a sharp knife to cut clean, even slices. Wipe the blade between cuts for neat edges.
- Pair with fresh berries or a dollop of whipped cream for added flair.
- Serve on a decorative platter for special occasions or potlucks.
| Storage Method | Duration | Tips |
|---|---|---|
| Refrigeration | Up to 5 days | Cover tightly to retain moisture. |
| Freezing | Up to 3 months | Wrap individually and thaw in the fridge. |
By following these guidelines, you’ll ensure your dessert stays fresh and delicious, whether you’re enjoying it immediately or saving it for later. Attention to detail in storage and presentation makes all the difference.
Conclusion
Mastering this dessert is all about balancing flavors and textures. From the buttery crust to the tangy filling, each step plays a vital role in creating the perfect treat. Using the right baking pan and precise measurements ensures consistent results every time.
Remember, the key lies in fresh ingredients and proper techniques. Whether you’re new to baking or a seasoned pro, this recipe is designed to impress. Don’t hesitate to experiment with substitutions to suit your dietary needs.
Share your creations with family and friends, and enjoy the delightful harmony of flavors. Ready to get started? Gather your tools and ingredients, and let’s bake something unforgettable!