
There’s something magical about the aroma of freshly baked bread filling your kitchen. For those who follow a gluten-free lifestyle, finding that perfect loaf can feel like a quest. But what if I told you that you can create a delicious gluten-free sourdough that’s not only easy to make but also pairs perfectly with a savory dish? This recipe is here to change the game.
Using high-quality ingredients like Schär gluten-free breadcrumbs, this recipe ensures every bite is packed with flavor. The best part? It’s versatile and simple, making it ideal for both beginners and seasoned cooks. Whether you’re baking in the oven or experimenting with new techniques, this guide has you covered.
Ready to dive in? Let’s explore how you can create a meal that’s as satisfying as it is wholesome. With step-by-step instructions, you’ll master this recipe in no time. Get ready to impress your family and friends with a dish that’s both delicious and nutritious.
Key Takeaways
- Learn how to make a simple and flavorful gluten-free sourdough.
- Discover the benefits of using certified gluten-free ingredients like Schär.
- Explore versatile cooking methods, including oven baking.
- Pair your sourdough with a savory dish for a complete meal.
- Follow detailed, step-by-step instructions for success.
Introduction to Gluten-Free Cooking & Sourdough
Exploring gluten-free cooking opens up a world of delicious possibilities. Whether you’re new to this lifestyle or a seasoned pro, understanding the basics can make all the difference. Gluten-free meals can be just as flavorful and satisfying as their traditional counterparts, especially when you use the right ingredients and techniques.
One of the stars of gluten-free baking is sourdough. Its natural fermentation process enhances both flavor and texture, giving your bread a unique depth. Sourdough is also easier to digest, making it a great choice for those with dietary sensitivities.
To get started, focus on essential ingredients like certified gluten-free bread and spices such as garlic. These elements add richness and complexity to your dishes. When it comes to prep, using the right tools, like a sturdy bowl, ensures your ingredients are well combined without hassle.
Here are a few practical tips to make your cooking experience smoother:
- Measure your ingredients accurately for consistent results.
- Use a large bowl to mix your dough or batter thoroughly.
- Incorporate spices like garlic early in the process for maximum flavor infusion.
By following these steps, you’ll create meals that are not only delicious but also tailored to your dietary needs. Gluten-free cooking is all about creativity and simplicity, and with the right approach, you’ll master it in no time.
Gluten Free Meatball Recipe: Step-by-Step Instructions
The secret to tender, flavorful meatballs lies in the details. With the right technique and tools, you can create a dish that’s both delicious and easy to prepare. Let’s break down the process step by step.
Recipe Overview and Technique
Start by gathering your ingredients in a large bowl. This ensures everything is evenly combined without overworking the mixture. Overmixing can lead to tough meatballs, so handle the ingredients gently.
Once your ingredients are in the bowl, use your hands or a spoon to mix them just until combined. Let the mixture sit for a few minutes to allow the flavors to meld. This step is crucial for achieving the perfect texture.
Next, use a greased cookie scoop to portion the mixture. Roll each portion into a ball, ensuring they’re all the same size for even cooking. This hands-on technique ensures consistency and helps the meatballs cook uniformly.
Bake the meatballs in a preheated oven for about 30 minutes. To ensure they’re fully cooked, use an instant-read thermometer. The internal temperature should reach 165°F for safe consumption.
Here’s a quick summary of the key steps:
- Combine ingredients in a large bowl and mix gently.
- Let the mixture sit for a few minutes.
- Use a cookie scoop to portion and roll into balls.
- Bake for 30 minutes and check the internal temperature.
By following these steps, you’ll create meatballs that are tender, flavorful, and perfectly cooked every time.
Essential Ingredients for Flavorful Meatballs
Crafting flavorful dishes starts with selecting the right ingredients. For meatballs, the combination of meat, binders, and spices creates a perfect balance of taste and texture. Let’s explore the key components that make this dish a standout.
Meat Options and Dairy Considerations
Choosing the right meat is crucial for flavor and texture. Ground beef is a popular choice, offering a rich taste and firm structure. For added depth, consider mixing beef with pork. This combination enhances juiciness and complements the seasoning.
Dairy plays a role in binding and moisture. Traditional recipes often use milk or cheese, but dairy-free alternatives like unsweetened almond milk or dairy-free cheese work just as well. These options ensure the dish remains inclusive without sacrificing flavor.
Gluten-Free Binders and Spices
Binders are essential for holding the mixture together. An egg acts as a natural binder, while breadcrumbs add structure. For a gluten-free option, Schär gluten-free breadcrumbs are an excellent choice. They provide the same consistency without compromising dietary needs.
Spices like onion and garlic elevate the flavor profile. Incorporating these early in the process ensures they infuse the mixture evenly. Fresh herbs or dried spices can also be added for a personalized touch.
| Ingredient | Purpose | Options |
|---|---|---|
| Ground Beef | Base for flavor and texture | Beef, Pork Mix |
| Binder | Holds mixture together | Egg, Schär Breadcrumbs |
| Spices | Enhances flavor | Onion, Garlic, Herbs |
By carefully selecting and combining these ingredients, you’ll create meatballs that are flavorful, tender, and suitable for various dietary preferences. The right choices ensure every bite is a delight.
Preparing and Mixing Your Ingredients
The way you combine your ingredients can make or break the final result. Proper preparation and mixing techniques are essential for achieving a tender and flavorful dish. Let’s dive into the steps to ensure your mixture is perfectly balanced.
Optimal Mixing Methods
Start by gathering all your ingredients in a bowl. Use a tablespoon to measure spices and binders accurately. This ensures even distribution and prevents clumping. Gently mix the ingredients using your hands or a spoon. Overmixing can lead to a tough texture, so handle the mixture with care.
Let the mixture sit for a few minutes after combining. This allows the flavors to meld and the binders to work their magic. The result is a cohesive mixture that’s easy to shape and cook evenly.
Avoiding Overmixing for Tender Results
One of the most common mistakes is overworking the mixture. To keep your dish tender, mix just until the ingredients are combined. Overmixing can break down the proteins, leading to a dense and chewy texture.
Here are a few tips to avoid overmixing:
- Use a tablespoon to add spices and binders gradually.
- Mix in a circular motion, stopping as soon as the ingredients are evenly distributed.
- Let the mixture rest before shaping or cooking.
By following these steps, you’ll create a dish that’s not only flavorful but also perfectly tender. The right preparation and mixing techniques ensure every bite is a delight.
Exploring Cooking Techniques for Perfect Meatballs
Choosing the right cooking method ensures your dish turns out perfectly. Whether you’re aiming for juicy, evenly cooked results or a crispy exterior, the technique you use makes all the difference. Let’s explore the best ways to cook your dish, focusing on baking, broiling, and pan-frying.
Baking for a Juicy, Evenly Cooked Finish
Baking is a reliable method for achieving consistent results. Preheat your oven to 375°F and place your dish on a greased baking sheet. This method ensures even cooking and allows the juices to stay locked in. Bake for about 30 minutes, checking the internal temperature to ensure it reaches 165°F.
Using a baking sheet also makes clean-up easier. Simply line it with parchment paper or foil for quick disposal. Baking is ideal for those who prefer a hands-off approach while still achieving tender, flavorful results.
Broiling and Pan-Frying Alternatives
Broiling adds a crispy, caramelized crust to your dish. Place it on a baking sheet and broil for 5-7 minutes, keeping a close eye on the time to prevent burning. This method is perfect for adding a flavorful outer layer.
Pan-frying, on the other hand, creates a golden-brown exterior while keeping the inside moist. Heat oil in a skillet and cook each side for 3-4 minutes. This method requires more attention but delivers a rich, savory taste.
Here’s a quick comparison of the methods:
| Method | Benefits | Time |
|---|---|---|
| Baking | Even cooking, easy clean-up | 30 minutes |
| Broiling | Crispy exterior, quick | 5-7 minutes |
| Pan-Frying | Golden crust, rich flavor | 6-8 minutes |
For make-ahead convenience, consider freezing your dish. Place them in a quality container and store for up to three months. When ready to cook, thaw in the fridge overnight and follow your preferred method.
Sauces, Sides, and Serving Suggestions
Pairing your dish with the right sauces and sides can elevate it from good to unforgettable. The right combination not only enhances flavor but also adds visual appeal to your meal. Let’s explore some classic and creative options to make your dish shine.

Marinara and Other Sauce Pairings
Marinara sauce is a timeless choice that complements almost any dish. Its rich tomato base and aromatic herbs add depth and warmth. For a classic pairing, use about a cup of marinara per serving. This ensures every bite is flavorful without overwhelming the dish.
If you’re looking for variety, consider alternatives like creamy Alfredo or zesty pesto. These sauces can be made from scratch or purchased in a bag for convenience. Each option brings a unique twist, allowing you to customize your meal to suit your taste.
Serving Suggestions
For a complete meal, pair your dish with spaghetti or other pasta options. Gluten-free pasta works perfectly, maintaining the dish’s integrity while catering to dietary needs. Add a side salad for freshness and balance.
Here’s a quick guide to portion sizes and pairings:
| Sauce | Portion | Pairing |
|---|---|---|
| Marinara | 1 cup | Spaghetti, Side Salad |
| Alfredo | 1/2 cup | Pasta, Roasted Veggies |
| Pesto | 1/4 cup | Zoodles, Garlic Bread |
For creative plating, arrange your dish on a colorful plate with a drizzle of sauce and a sprinkle of fresh herbs. This not only enhances the flavor but also makes the meal visually appealing. Whether you’re serving a crowd or enjoying a quiet dinner, these suggestions ensure every bite is a delight.
Make-Ahead Strategies and Freezing Tips
Planning meals in advance can save time and stress on busy nights. Whether you’re preparing for a hectic week or stocking your freezer, these tips ensure your food stays fresh and flavorful. Let’s dive into the best practices for freezing and reheating.
Proper Freezing Techniques
Flash-freezing is a great way to maintain the shape and texture of your dish. Start by placing your prepared items on a sheet lined with parchment paper. Make sure they’re spaced apart to prevent sticking. Place the sheet in the freezer for 1-2 hours until fully frozen.
Once frozen, transfer the items to an airtight container or a resealable freezer bag. Label the container with the date to keep track of storage time. Properly stored, your food can last up to three months without losing quality.
Reheating Methods to Retain Moisture
When it’s time to enjoy your meal, reheating it properly is key to retaining moisture. For best results, thaw your dish in the fridge overnight. To reheat, use an oven preheated to 350°F. Place the items on a sheet and cover with foil to lock in moisture. Bake for 15-20 minutes or until heated through.
For quicker reheating, use a saucepan on the stovetop. Add a splash of water or broth to prevent drying out. Stir occasionally to ensure even heating. These methods keep your dish tender and delicious.
Here’s a quick summary of the steps:
- Flash-freeze on a sheet to maintain shape.
- Transfer to an airtight container for storage.
- Reheat in the oven or on the stovetop for best results.
With these strategies, you’ll always have a homemade meal ready to enjoy, even on the busiest nights.
Adapting the Recipe for Special Dietary Needs
Adapting recipes to meet dietary needs doesn’t have to be complicated. Whether you’re avoiding dairy or cutting carbs, a few simple substitutions can make this dish work for you. Let’s explore how to customize it without sacrificing flavor or texture.

Dairy-Free Substitutions and Alternatives
For a dairy-free version, replace traditional milk with unsweetened almond milk or another dairy-free option. Nutritional yeast can add a cheesy flavor without the dairy. Simply leave out cheese or use a dairy-free alternative to keep the dish inclusive.
Here’s a quick guide to dairy-free swaps:
- Use unsweetened almond milk instead of regular milk.
- Replace cheese with nutritional yeast or dairy-free cheese.
- Opt for dairy-free binders like flax eggs if needed.
Low-Carb Options with Almond Flour
To make this dish low-carb, swap traditional breadcrumbs with almond flour. This not only reduces carbs but also adds a nutty flavor. Almond flour works well as a binder, ensuring the mixture holds together without the extra carbs.
Here’s how to make low-carb adjustments:
- Replace breadcrumbs with almond flour for a low-carb binder.
- Use lean ground meat or ground pork to keep the dish light.
- Add spices like garlic and onion for flavor without added carbs.
| Dietary Need | Substitution | Benefit |
|---|---|---|
| Dairy-Free | Unsweetened almond milk, nutritional yeast | Inclusive, flavorful |
| Low-Carb | Almond flour, lean ground meat | Reduced carbs, rich flavor |
By making these adjustments, you can create a dish that fits your dietary needs while still being delicious. Whether you’re avoiding dairy or cutting carbs, these tips ensure every bite is satisfying.
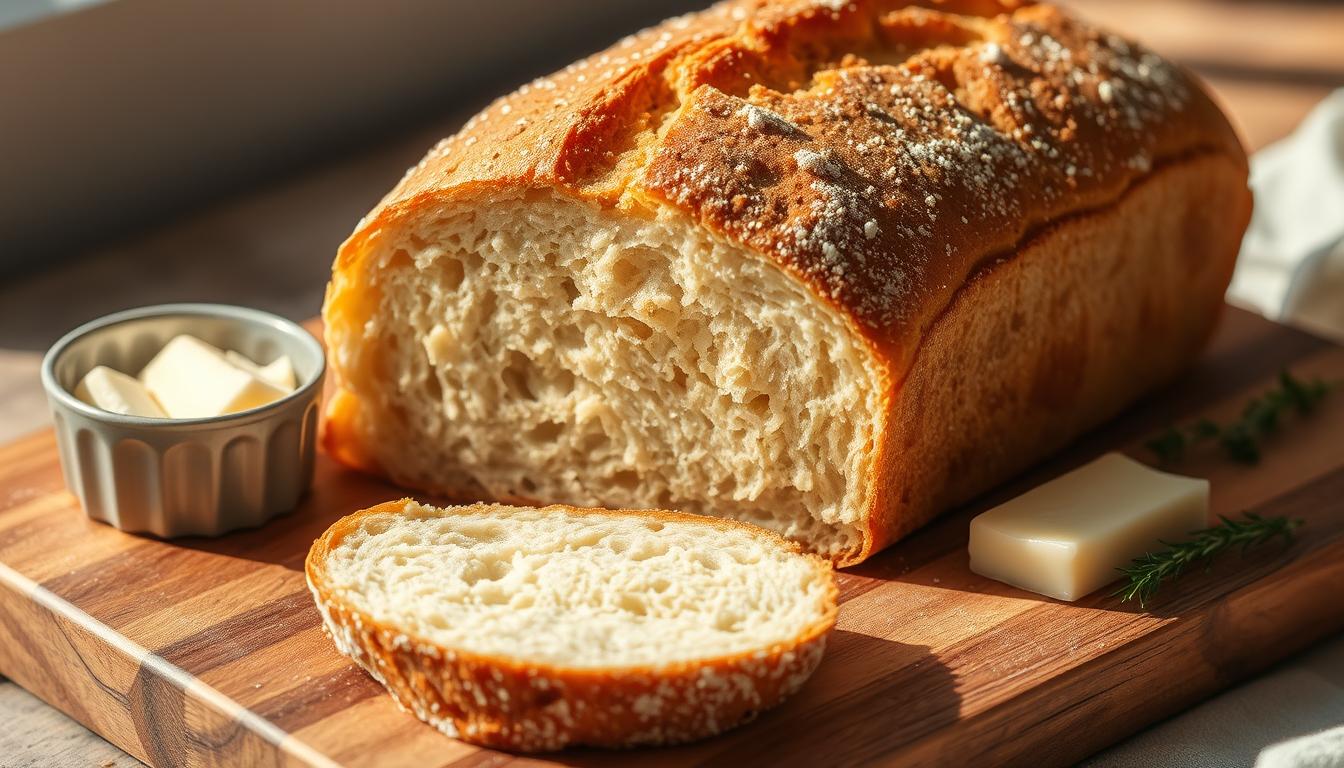
Incorporating Gluten-Free Sourdough in Your Meal
Transform your dinner with a creative twist by pairing sourdough and savory dishes. This combination not only enhances flavor but also adds a touch of elegance to your meal. Whether you’re serving a family gathering or enjoying a quiet evening, sourdough can elevate your dining experience.
Pairing Sourdough with Savory Dishes
Sourdough’s tangy flavor and chewy texture perfectly complement the richness of a meatball recipe. Its natural acidity balances the savory notes, creating a harmonious blend of tastes. For a complete meal, consider serving your dish over a bed of pasta. The combination of textures and flavors will leave your guests impressed.
Here are some creative ways to incorporate sourdough into your meal:
- Use sourdough as a base for dipping into marinara or other sauces.
- Place a slice of toasted sourdough alongside your dish for added crunch.
- Turn it into a full dinner by pairing it with a side salad or roasted vegetables.
Presentation is key to making your meal visually appealing. Arrange the sourdough and meatballs on a plate with a drizzle of sauce and a sprinkle of fresh herbs. This not only enhances the flavor but also makes the meal feel special. Whether you’re hosting a gathering or enjoying a cozy night in, sourdough adds a unique touch to your dinner.
Common Pitfalls and Expert Pro Tips
Even the simplest dishes can go wrong if you overlook key techniques. Whether you’re a beginner or a seasoned cook, avoiding common mistakes ensures your dish turns out perfectly every time. Let’s explore how to create tender, flavorful results while sidestepping pitfalls.

Ensuring Juicy and Tender Results
One of the most common mistakes is overmixing the ingredients. This can lead to a dense and chewy texture. To keep your dish tender, mix gently just until the ingredients are combined. Using a combination of pork and other meats can also enhance juiciness.
Another tip is to let the mixture rest before shaping. This allows the flavors to meld and the binders to work effectively. Avoid pressing too hard when forming the balls, as this can compact the mixture and result in a tough texture.
Tips for Consistent Sizing and Baking
Uniform sizing is key to even cooking. Use a cookie scoop or tablespoon to portion the mixture. Roll each portion gently into a ball, ensuring they’re all the same size. This ensures they cook evenly and prevents some from being undercooked or overcooked.
When baking, preheat your oven and use a meat thermometer to check for doneness. The internal temperature should reach 165°F for safe consumption. Covering the dish with foil during baking can also help retain moisture.
Here are some expert tips to keep in mind:
- Mix ingredients gently to avoid overworking the mixture.
- Use a cookie scoop for consistent sizing.
- Check the internal temperature with a meat thermometer.
- Let the mixture rest before shaping for better texture.
By following these steps, you’ll create a dish that’s juicy, tender, and full of flavor. Whether you’re cooking for a crowd or a quiet dinner, these tips ensure success every time.
Conclusion
Creating a memorable meal starts with quality ingredients and careful preparation. From mixing the mixture gently to baking in the oven, each step ensures tender and flavorful results. Using high-quality components like fresh herbs and spices elevates the dish, making it a standout for any dinner.
Expert tips, such as portioning with a cookie scoop and checking internal temperatures, guarantee consistent results. Whether you’re pairing it with bread or a side of pasta, the versatility of this dish makes it a crowd-pleaser. Freezing leftovers in an airtight container ensures you can enjoy it anytime.
Experiment with confidence, knowing this recipe adapts easily to dietary needs. From dairy-free swaps to low-carb options, it’s designed to fit your lifestyle. Try it today and discover a new favorite way to bring flavor to your table!